 ChatGPT
 Perplexity
 Gemini
 Claude
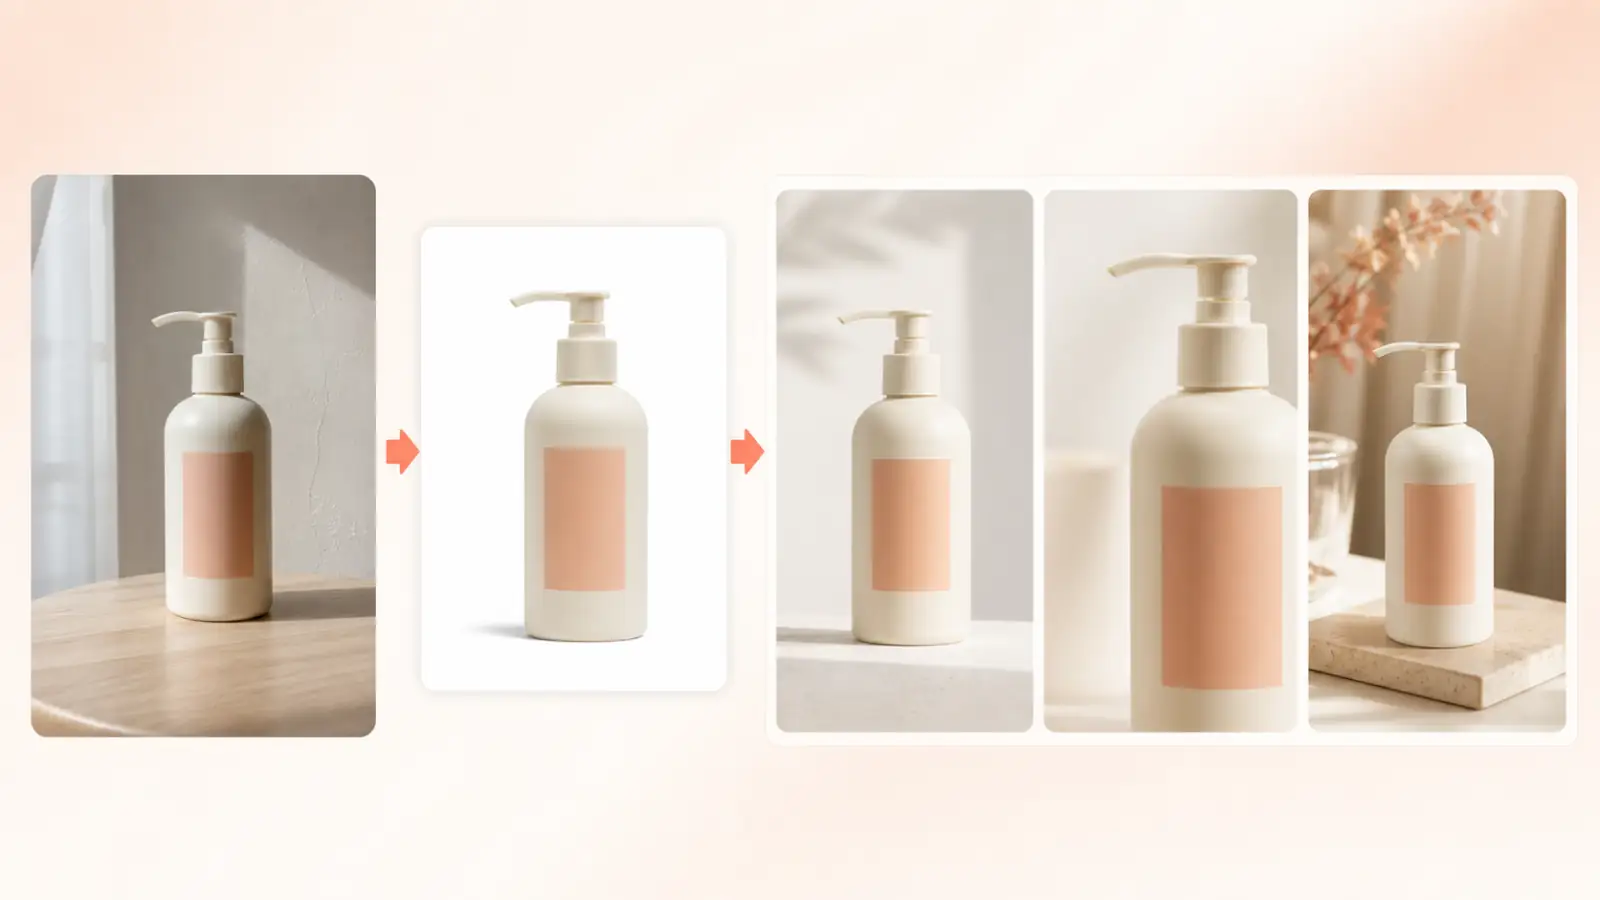
You have a product photo, but you still need a clean product shot, feature images and lifestyle scenes for your store. If you have never designed a listing gallery, deciding what to show can be harder than generating the pictures.
You can let AI handle that planning. Upload the photo, provide the product facts you know, review the proposed image set, then generate one image at a time. You do not need to write studio-photography prompts from scratch.
This guide breaks the process into five steps, with copyable prompts for creating a clean reference, a product brief and a complete set of image-generation instructions.
The workflow: provide the facts, let AI plan the images
Your most important checks are simple: Is this still the same product? Is everything it claims true? AI can propose the composition, lighting, background and role of each image.
| Step | What AI does | What you review |
|---|---|---|
| 1. Clean product reference | Simplifies the background and presentation | Product shape, packaging and label accuracy |
| 2. Product brief | Organizes known facts and flags missing information | Specifications, audience and sales channel |
| 3. Image plan and prompts | Gives each image a purpose and writes the prompts | Whether the set answers useful buying questions |
| 4. Generate the images | Produces each composition from the shared reference | Consistency, text and scene accuracy |
| 5. Review and revise | Fixes the relevant prompt or planning step | Whether the specific problem is resolved |
Clean reference
Preserve the real product.
Product brief
Confirm facts and audience.
Image plan
Give each image a purpose.
Generate
Use one prompt at a time.
Review
Check details and revise.
Have your original product photo ready. Use Mireka for image generation and an image-capable AI chat assistant for the written brief and planning prompts below. These are two parts of the workflow; a planning prompt is not an instruction to generate the entire gallery as one image.
Step 1: Create a clean product reference
Open Mireka's AI image generator, select Image to Image, and upload the product photo. Create one clean reference that you can reuse throughout the project.
A clear reference helps keep the product's silhouette, label and colors consistent when you change the surrounding scene. It should not “improve” the physical product into something different.
Prompt: clean up the reference photo
Use the uploaded product photo as the source of truth. Create a clean product
reference image for use in later ecommerce image generation.

Preserve the actual product: category, silhouette, proportions, structure,
color, materials, logo, label, packaging and all visible identifying details.
Do not redesign it, replace it with a similar item or invent missing features.

Remove unrelated background objects, clutter and distracting reflections.
Place the complete product on a pure white or light neutral background with
soft, even lighting and a subtle, natural contact shadow. Keep the edges clear
and the materials realistic. Do not crop the product.

Do not add promotional text, badges, decorations, accessories, buttons, ports,
openings or packaging details that are not present in the source.
Preserve existing product text and logos rather than rewriting them.

If several reference photos are supplied, they show the same SKU. Use them
together to preserve its appearance. Do not invent a back view, interior or
hidden detail that the photos do not establish.

Output one clean product reference image, not a collage or presentation board.
Inspect the result beside the original. Check the cap, lid, handle, seams, label placement, small print and proportions. If something changed, fix this reference before making the rest of the set. Otherwise, the error can carry into every later image.
Step 2: Ask AI to write a product brief
Upload the original photo and approved clean reference to an image-capable AI chat. Provide what you know about the product, destination and audience. Leave unknown fields marked Needs confirmation rather than guessing.
The goal is a reliable product brief—a shared reference for the facts and creative direction—not a finished advertising layout yet.
Prompt: build the product brief
Help me create a product brief for an ecommerce image set. I am not a designer.
Use the uploaded product images and the information below.

Sales channel: [Amazon / Shopify store / another marketplace / social ads]
Target market: [country or region]
Image copy language: [for example, US English]
Number of images required: [number]
Image purpose: [main listing image / gallery images / ads / a complete set]
Aspect ratio or dimensions: [requirements, if known]
Product name:
Brand:
Product category:
Confirmed selling points:
Confirmed specifications, ingredients or materials:
Target customers:
Typical uses:
Price positioning: [budget / mid-range / premium / not specified]
People in the images: [required / not allowed / suggest whether useful]
Type of person or interaction, if needed:
Faces visible: [yes / no / not applicable]
Added text in images: [yes / no]
Things to exclude:
Other requirements:

Organize the brief into three clearly separated sections:
1. Confirmed facts from my information and clearly visible details in the photos.
2. Creative suggestions that need my approval.
3. Missing information marked "Needs confirmation."

Do not invent capacity, dimensions, ingredients, materials, country of origin,
certifications, patents, performance claims, sales rankings, awards, discounts,
prices or warranty terms. Do not infer a specification from appearance alone.

Include the product appearance that must remain unchanged, the intended buyer,
the sales channel, the image roles we may need, and the language and tone of copy.
Use the target market's spelling and the verified units I provide. Do not
convert or round specifications unless I ask you to.

Do not write image-generation prompts yet. First give me the brief to review
and a short list of questions that would materially improve it.
Review the brief before moving on
Check these five areas:
- Product identity: it describes your exact item, not a similar-looking product.
- Facts: quantities, materials and claims are supported by your information.
- Destination: the main image, gallery and advertising placements are distinguished.
- Audience and language: spelling, tone and buying context fit the target market.
- People and text: the proposed visuals follow your choices about faces, hands and overlays.
If the AI filled a gap with an assumption, correct the brief directly:
Revise the product brief with these corrections:
[Paste the corrections here.]

Remove unsupported claims. Keep unresolved facts in a separate
"Needs confirmation" list. Do not include them in customer-facing copy.
Keep confirmed product details unchanged and return the complete revised brief.
A complete brief can still contain unknowns. What matters is keeping them separate from approved facts.
Step 3: Let AI plan the image set and write each prompt
Ask the same assistant to use the approved brief and photos to plan a gallery. Each image should answer a different buying question. A bottle might need an ingredient image and a serving scene; a desk lamp might need scale, controls and a workspace scene.
Do not force every product into the same “hero, benefits, lifestyle, detail” template. Let the product, destination and buyer determine the sequence.
Prompt: create the image plan and complete prompts
Act as an ecommerce art director, product photographer and image planner.
Use the approved product brief and uploaded product references to design a
coordinated image set. I will generate the images individually in Mireka.

Create the number of images specified in the brief. Give each image a distinct
purpose based on the product, audience, sales channel and buying questions.
Do not simply repeat the same product with a different background.

Before planning, verify:
1. The references show the same SKU, not different versions.
2. Product shape, proportions, color, materials and packaging stay fixed.
3. Confirmed facts, creative suggestions and unknowns remain separate.
4. The plan distinguishes the main listing image from gallery or ad images.
5. Aspect ratio and composition fit each intended placement.
6. No unsupported specification, feature or performance claim is introduced.
7. Props and accessories cannot be mistaken for items included in the purchase.
8. Usage scenes match a confirmed use of the product.
9. People appear only when permitted and useful to explain the product.
10. Text follows the chosen language, tone and approved claims.
11. Images complement each other rather than repeat the same message.
12. Every proposed image can be made from the available reference evidence.

Product consistency rules:
- Start every image prompt with a full description of the product details
  that must remain unchanged. Do not write only "same product as before."
- Use the clean product reference for every image.
- Keep existing logos and label text accurate. Do not redesign the packaging.
- Do not invent unseen internal parts, rear features, bundled items or uses.

Placement rules:
- For a main listing image, follow the requirements of the specified sales
  channel and category. If a pure white product-only image is required,
  do not add a lifestyle scene, text overlays, badges or unrelated props.
- Treat lifestyle scenes and information graphics as separate gallery or
  advertising candidates, subject to the destination's rules.

People rules:
- If people are not allowed, include no people, faces, hands or body parts.
- If hands are allowed but faces are not, specify a hands-only composition
  with no visible face, eyes, nose or mouth.
- Keep anatomy and product scale natural. Use fictional, age-appropriate
  people rather than real-person or celebrity likenesses.

Text rules:
- If added text is not allowed, include no new headings, badges, icons or
  promotional copy. This does not mean removing the real product label.
- If text is allowed, use short, approved copy in the requested language.
  Specify its exact wording and placement. Do not invent claims.
- Keep unknowns and planning placeholders out of final image prompts and
  customer-facing copy. List unresolved questions separately.

Return:
A. A concise product appearance specification that applies to the full set.
B. An image-plan table with: image number, buyer question, intended placement,
   composition, background, lighting, props, people, exact copy and review notes.
C. A complete, standalone prompt for every image, numbered to match the table.
   Include product preservation, composition, setting, light, materials,
   permitted props, people, copy placement and exclusions in each prompt.
D. Any remaining questions that must be resolved before generation.

Keep the set visually coordinated, but vary compositions where that helps
communicate different information. Output the plan and prompts as text;
do not combine all images into one collage.
Make one editorial pass
Read the plan as a shopper. Can you tell what the product is, why its features matter and how it fits into a real setting? Remove repeated images that answer the same question.
You do not need to rewrite the photography language yourself. Tell the assistant what needs changing—for example, “Image 2 repeats image 1; use it to show the verified dimensions instead”—and ask for the revised full prompt for that image.
Step 4: Generate one image at a time in Mireka
Return to Image to Image in Mireka:
- Upload the approved clean product reference.
- Paste the complete prompt for image 1.
- Choose a model and the planned aspect ratio and resolution.
- Check the displayed credit cost, then generate.
- Review the product and copy before proceeding to image 2.
Reuse the same approved reference for the next image. Do not rely only on the last generated scene: successive edits can gradually change the packaging or proportions.
Check each image as it arrives. Generating individually lets you stop after a label error or shape change and fix that one composition, instead of carrying the mistake through the entire set.
Step 5: Fix the right part of the workflow
When an image is wrong, identify the source of the problem before rewriting everything.
| Problem | Go back to | What to change |
|---|---|---|
| The item no longer matches the real product | Clean reference | Restore the original geometry, packaging and label |
| A specification or selling point is wrong | Product brief | Correct the facts and remove unsupported claims |
| Several images repeat the same message | Image plan | Give each image a distinct buyer question |
| One image has an awkward crop or background | That image's prompt | Revise composition, placement or lighting |
| The whole set feels inconsistent | Brief and image plan | Align palette, tone and visual direction |
Prompt: diagnose and revise a result
Upload the original photo, the approved reference, the generated image and the prompt that produced it. Then use:
Compare these four inputs:
1. The original product photo.
2. The approved clean product reference.
3. The generated result.
4. The prompt used for that result.

The problem I noticed is:
[Describe the problem.]

Return five things:
1. A short list of visible differences that matter for this product image.
2. Whether the cause should be fixed in the reference, product brief,
   image plan or this individual prompt.
3. What must stay unchanged in the next attempt.
4. A complete revised prompt I can paste into Mireka.
5. A focused checklist for reviewing the new result.

Do not fix one issue by redesigning the product or inventing new claims.
Preserve the successful parts of the current composition unless they conflict
with the correction. If a detail cannot be established from the inputs,
ask for a clearer reference rather than guessing.
Why this approach works
The reference establishes what the product looks like. The brief establishes what is true. The image plan decides what each picture should communicate. Individual prompts turn that plan into compositions you can generate and review.
Separating those jobs makes revisions easier. A wrong capacity belongs in the brief; an awkward shadow belongs in the image prompt. You can make the correction without rebuilding the entire gallery.
For a worked example, see the yuzu soda product-image case study. It shows the source photo, clean reference and four finished images, along with the recorded time and credits used.
Adapt the set to the sales channel
An Amazon main image, a Shopify gallery and a social ad have different jobs. Name the destination and placement in the brief before generating.
For Amazon, plan a separate product-only main image on pure white, without added promotional text or distracting extras. Check the applicable category requirements before uploading; Amazon's product photography guide explains the main-image basics.
For your own storefront, decide which images should identify the product quickly and which should explain features or show a lifestyle scene. For social ads, prioritize one clear message and compose for the intended placement. A square listing image will often need a new layout—not just a crop—to work well as a vertical ad.
If you sell internationally, localize the surrounding copy while keeping the actual packaging accurate. Use verified measurements and suitable spelling, and do not translate a physical label into a version the customer will not receive.
Final checklist before publishing
- Product: correct shape, color, packaging, logo and proportions.
- Facts: verified numbers, units, ingredients and claims.
- Text: every character, line break and label checked at full size.
- Context: props do not imply extra items are included; the scene shows a valid use.
- Consistency: the set uses compatible lighting, palette and tone.
- Destination: main-image and gallery requirements checked separately.
- Viewing size: the product and essential copy remain readable on a phone.
Frequently asked questions
Can I do this without design or photography experience?
Yes. You need a product photo, the facts you know and the ability to review the results. AI can propose the composition, lighting, image roles and complete prompts.
What if I do not know every product detail?
Provide what you know and let the assistant organize clearly visible details. Keep unverified specifications, claims, certifications and origin information marked as needing confirmation, rather than adding them to image copy.
Can one photo produce a complete product-image set?
It can provide a starting point for several images with different purposes. It cannot establish an unseen back view, internal structure or hidden feature. Supply more photos when a composition requires those details.
Can AI decide what each image should show?
Yes. Give it the sales channel, product category, image count and buyer questions. Review the proposed roles, then ask it to write a complete prompt for each approved image.
Why generate the images individually?
You can catch changes to the product or text immediately and revise only the affected image. That prevents the same mistake from spreading through the full set.
Can I use a lifestyle image or text graphic as an Amazon main image?
Do not assume it qualifies. Plan a separate main image that follows the current rules for the product category. Treat lifestyle scenes, information cards and promotional copy as candidates for other permitted placements.
Where should I start if the results look wrong?
Fix product appearance in the reference, facts in the product brief, and image roles in the plan. If only one composition or background is wrong, revise that image's prompt.